Author Archives: larsonm

An arduino-based remote control robot kit

I was asked by the Singapore American School’s robotics program to develop a robotics kit for their intro course that was able to drive two small DC motors wirelessly at low cost.  I picked the DFRobotics arduino-based gamepad as the controller and an arduino for the robot.  The two arduinos (gamepad and robot) communicate using xbees, which are small wireless modules that are easy to interface with using serial port communication.

The source code for both gamepad and robot can be found here:

https://github.com/larsonmpdx/SAS-robot

The readme at the github repository has most of the documentation.  Here are some pictures:

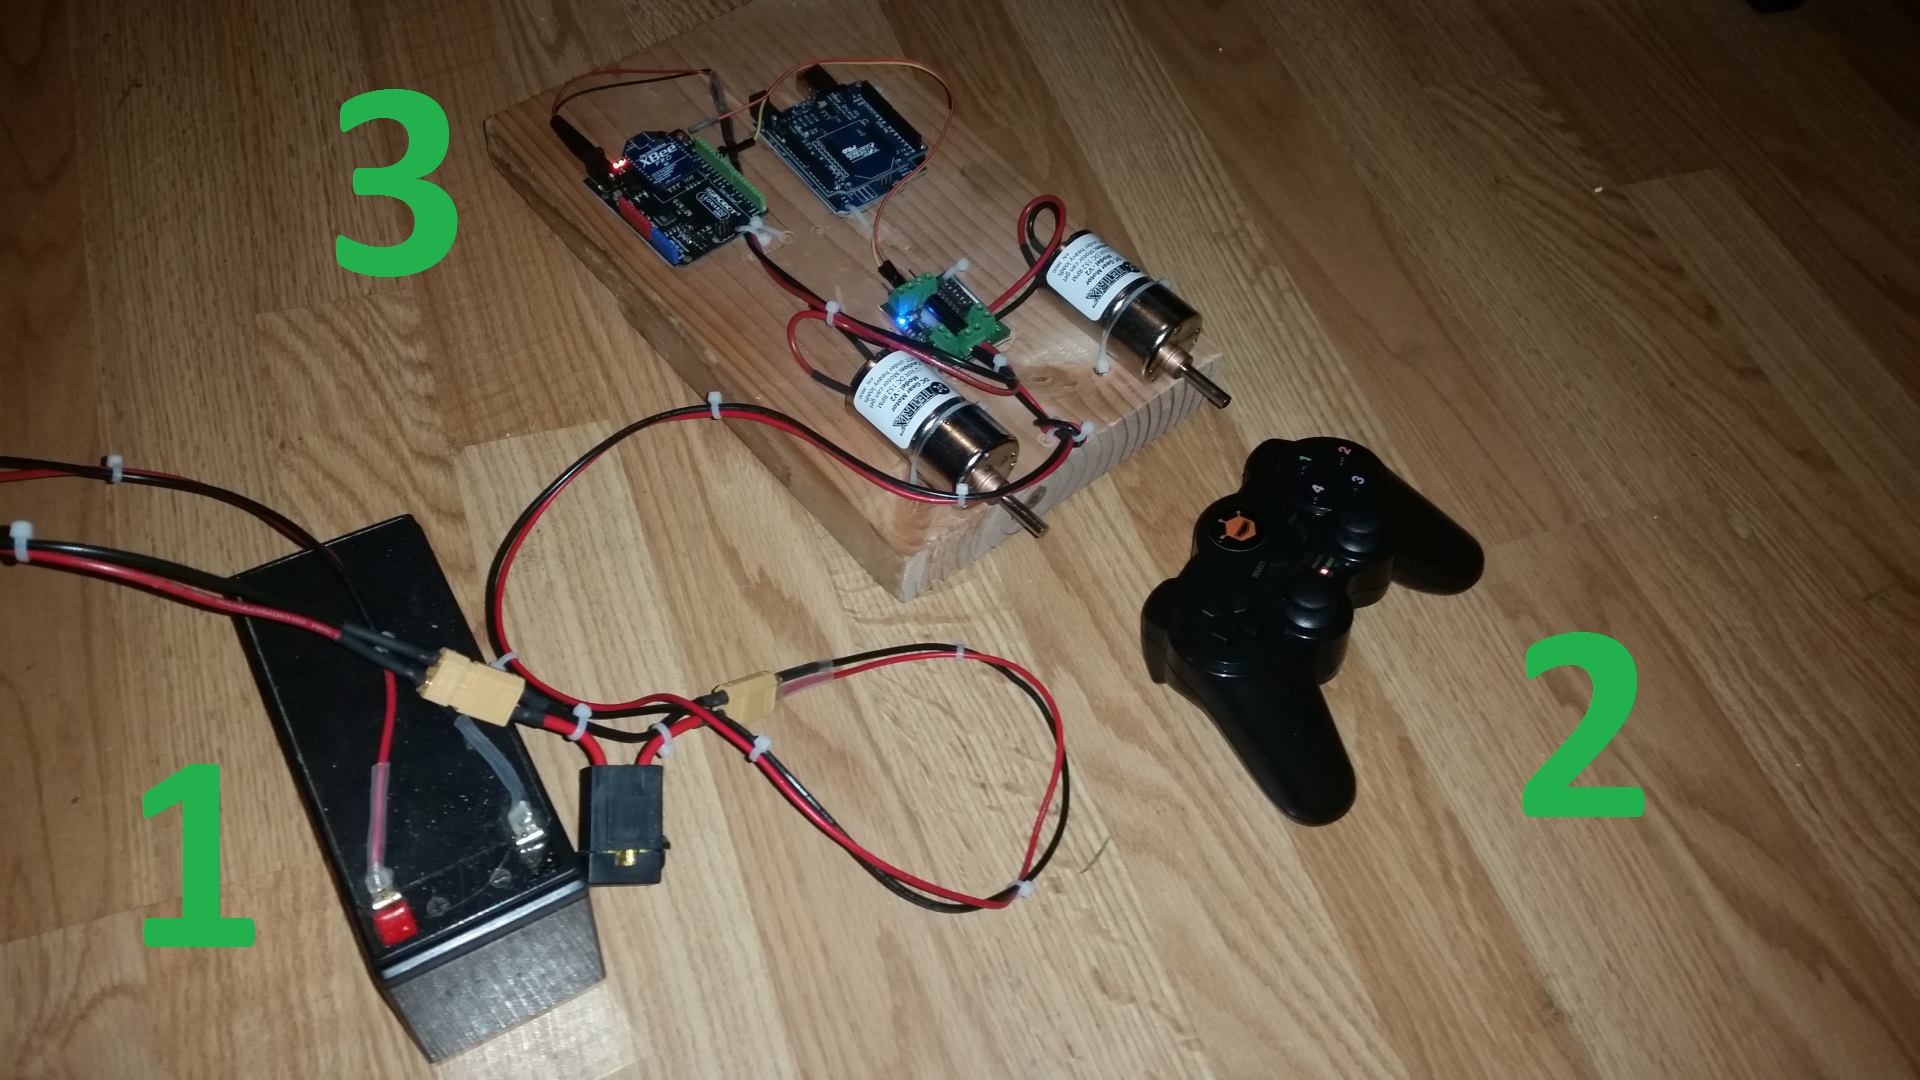
overall setup

  1. 12V sealed lead acid battery.  inline automotive fuse holder + fuse.  Yellow XT60 connectors (I put these on everything.  As of 2015, they have decisively won the RC connector wars)
  2. DFRobot controller.  Inside is an xbee series 1 60mW with wire antenna.  This is an arduino with xbee socket built into a playstation 1 frame.  It runs on 3 AAA batteries.  Programming/debugging is done through a little usb connector board that plugs into an exposed pin header on the back.  Don’t plug this in backwards!  I fried the USB functionality doing this (you can still use ICSP to program it, but it’s a pain)
  3. Robot demo board

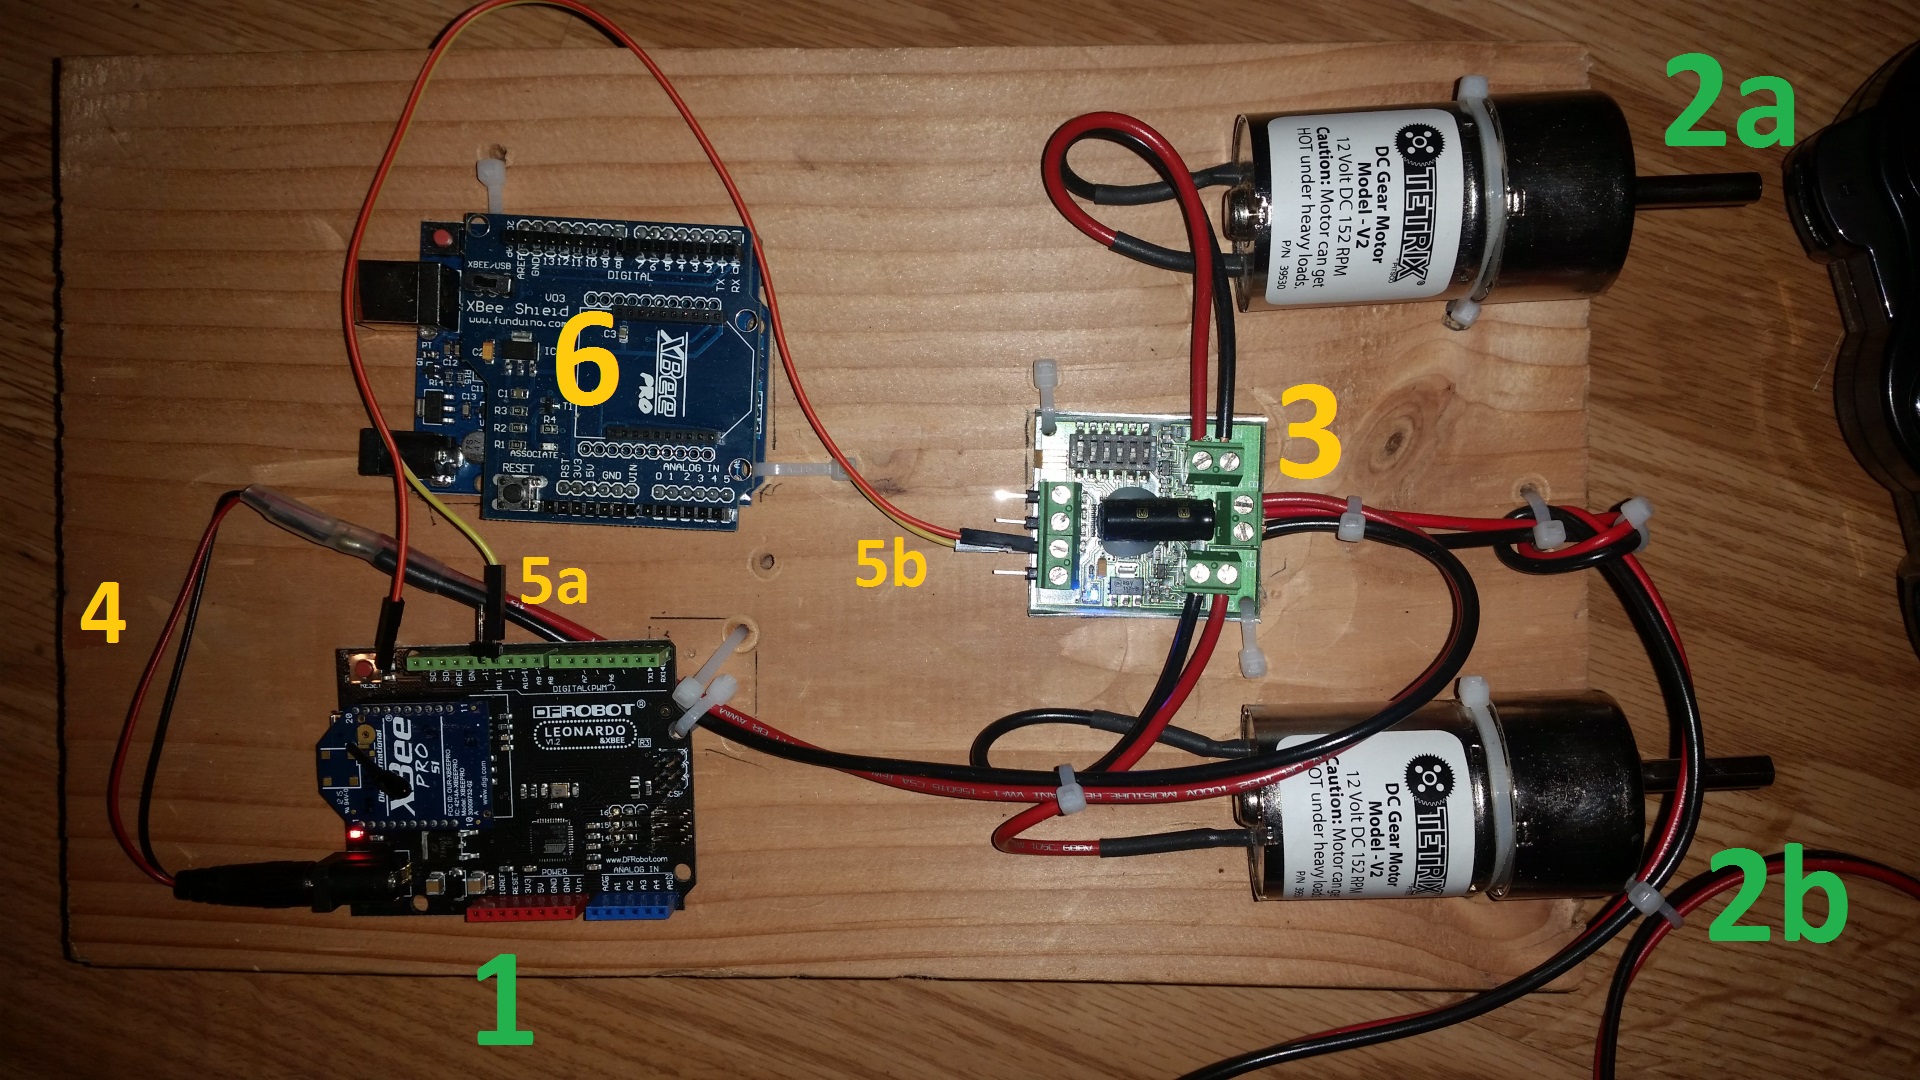
robot board

  1. DFRobot arduino leonardo with integrated xbee socket.  This could also be a regular arduino leonardo with an xbee shield.  Matching series 1 60mW wire antenna xbee
  2. a. b. tetrix DC gear motors.  These are 12V and draw maybe 1-5A depending on load
  3. Dimension Engineering sabertooth 2×5 DC motor controller.  This is hooked into 12V power, the two motors, and on the left side it has its control pins (I stuck pins in the terminal block to use a plug-on jumper).  The jumper is plugged into S1 because it’s configured in serial control mode.  The other pins in this block are GND, S2, and +5V BEC.  GND isn’t connected because the arduino shares a ground already through a shared power supply.  S2 isn’t used in this mode.  The +5V BEC doesn’t supply enough current to power an arduino plus a 60mW xbee, so it isn’t used
  4. arduino power cord.  These are available as pre-wired pigtails.  I soldered this to an extension and connected it to the 12V battery.  The connection is made at the motor controller’s input block by putting both pairs of wires in (near the number 3).  The arduino’s power supply is a linear regulator and the arduino runs on 5V, so powering it with 12V makes the regulator drop a lot of voltage internally, heating it up.  This works, but it’s at the limit of the arduino’s specs.  Just something to be aware of.
  5. a. b. Signal wire from the arduino to the motor controller.  This is a software serial port on the arduino on pin D11, connected to S1 on the sabertooth 2×5.  The yellow wire is used, the orange wire doesn’t go anywhere.
  6. extra arduino UNO and xbee shield.  I left this on the board to show another option.  I started prototyping with this and realized that it can’t support USB debugging and the xbee communications at the same time (both use the same serial port, it only has one).  I switched to using the arduino leonardo to gain an extra serial port for debugging.  I do not recommend using an arduino UNO, for this reason.

See the github readme for more in-depth documentation.  Overall, the kit works really well, with great control response time, good range with the 60mW xbees (I’m not sure how far – it covers my whole house), and OK gamepad battery life of a few hours (the gamepad needs 4 volts or higher to work well though, so I don’t recommend rechargeables).  It’s fully programmable and my hope is that students will be able to extend its functionality easily, using my example code as a starting point.
Banana pi as samba server – 22MB/s typical

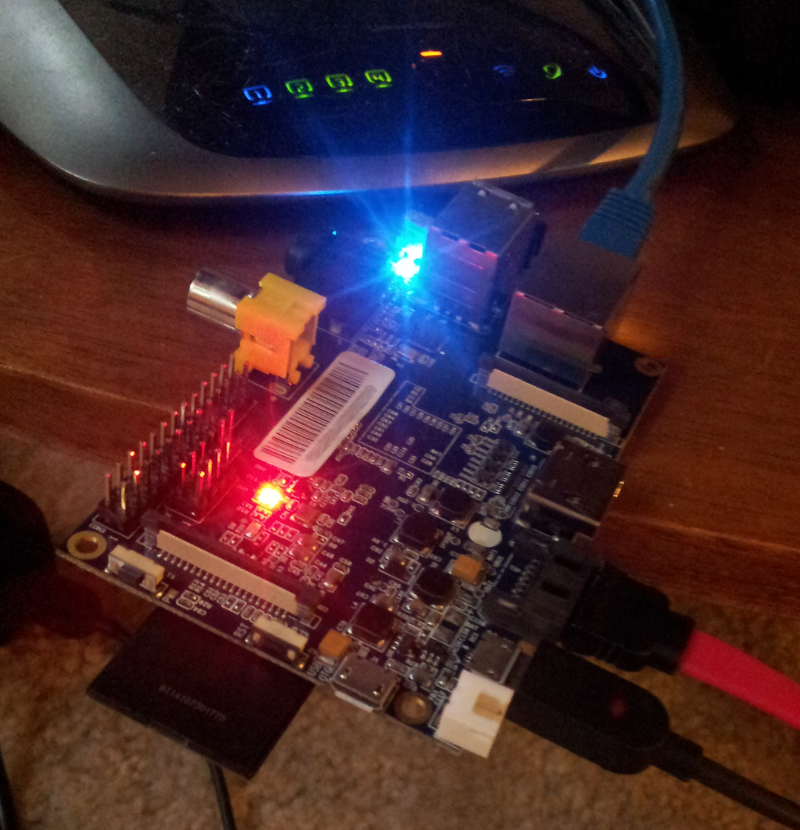
bananaI got a banana pi last week using alibaba.  It was $59 shipped and arrived in about a week from my order (China-Portland airmail is typically extremely fast).  here’s a link to the store I used:

http://www.aliexpress.com/store/product/Banana-PI-stronger-then-Raspberry-PI-512M-Model-B-2-0/302756_1680506877.html

here is a link to the image files available for it:

http://www.lemaker.org/index.php?m=content&c=index&a=show&catid=9&id=38

I used “raspberry pi for banana pi” which is actually just raspbian with a hacked-in kernel and uboot for the allwinner A20.  It extracted as an image file that I wrote with win32diskimager.  It requried an 8GB SD card which is too bad because it only uses 2.6GB when installed.

I got this thing to be a new samba and transmission-deamon server, as my raspberry pi is a bit slow (4.5MB/s typical samba read/write).  Using a SATA drive formatted to ext4 I’m getting about 22MB/s writes to the banana pi over gigabit ethernet.  This is on a drive that can do maybe 25-30MB/s writes locally.  It maxes out cpu usage one of the cores so I think it’s cpu-limited and might get a bit faster with some tuned samba options.  It’s plenty fast, no complaints, and I’m betting I won’t ever have to pause torrents again just to stream 1080p video like I did on the raspberry pi (as it will have one core for each task).

EWD 920

“Can computing science save the computer industry?”, E. W. Dijkstra, 1985

“The prime paradigma of the pragmatic designer is known as “poor man’s induction”, i.e. he believes in his design as long as “it works”, i.e. until faced with evidence to the contrary. (He will then “fix the design”.) The scientific designer, however, believes in his design because he understands why it will work under all circumstances. The transition from pragmatic to scientific design would indeed be a drastic change within the computer industry.”

https://www.cs.utexas.edu/users/EWD/ewd09xx/EWD920.PDF

https://www.cs.utexas.edu/users/EWD/transcriptions/EWD09xx/EWD920.html

EWD 952

“Science fiction and science reality in computing”, E. W. Dijkstra, 1986

“Recently, British Rail has installed its first computerized signalling system along one of its tracks and they advertised the system in the hope of selling it to other railroad companies by revealing that, in order to avoid the risk of using a compiler, the system had for safety’s sake been written in machine code.”

“… this is the paradox faced by all directors of industrial research laboratories: after having attracted the right people, they cannot serve their company better than by leaving those people alone.”

“…hiring a technical writer is rarely a solution; the act is usually not much more than an admission that the system’s designers are in some sense functionally illiterate.”

https://www.cs.utexas.edu/~EWD/ewd09xx/EWD952.PDF

https://www.cs.utexas.edu/~EWD/transcriptions/EWD09xx/EWD952.html

My favorite EWD

“On the cruelty of really teaching computing science”, E. W. Dijkstra, 1988

“…all by itself, a program is no more than half a conjecture. The other half of the conjecture is the functional specification the program is supposed to satisfy. The programmer’s task is to present such complete conjectures as proven theorems.”

http://www.cs.utexas.edu/users/EWD/ewd10xx/EWD1036.PDF

https://www.cs.utexas.edu/users/EWD/transcriptions/EWD10xx/EWD1036.html

clean raspberry pi install behind TV

pi tv front view

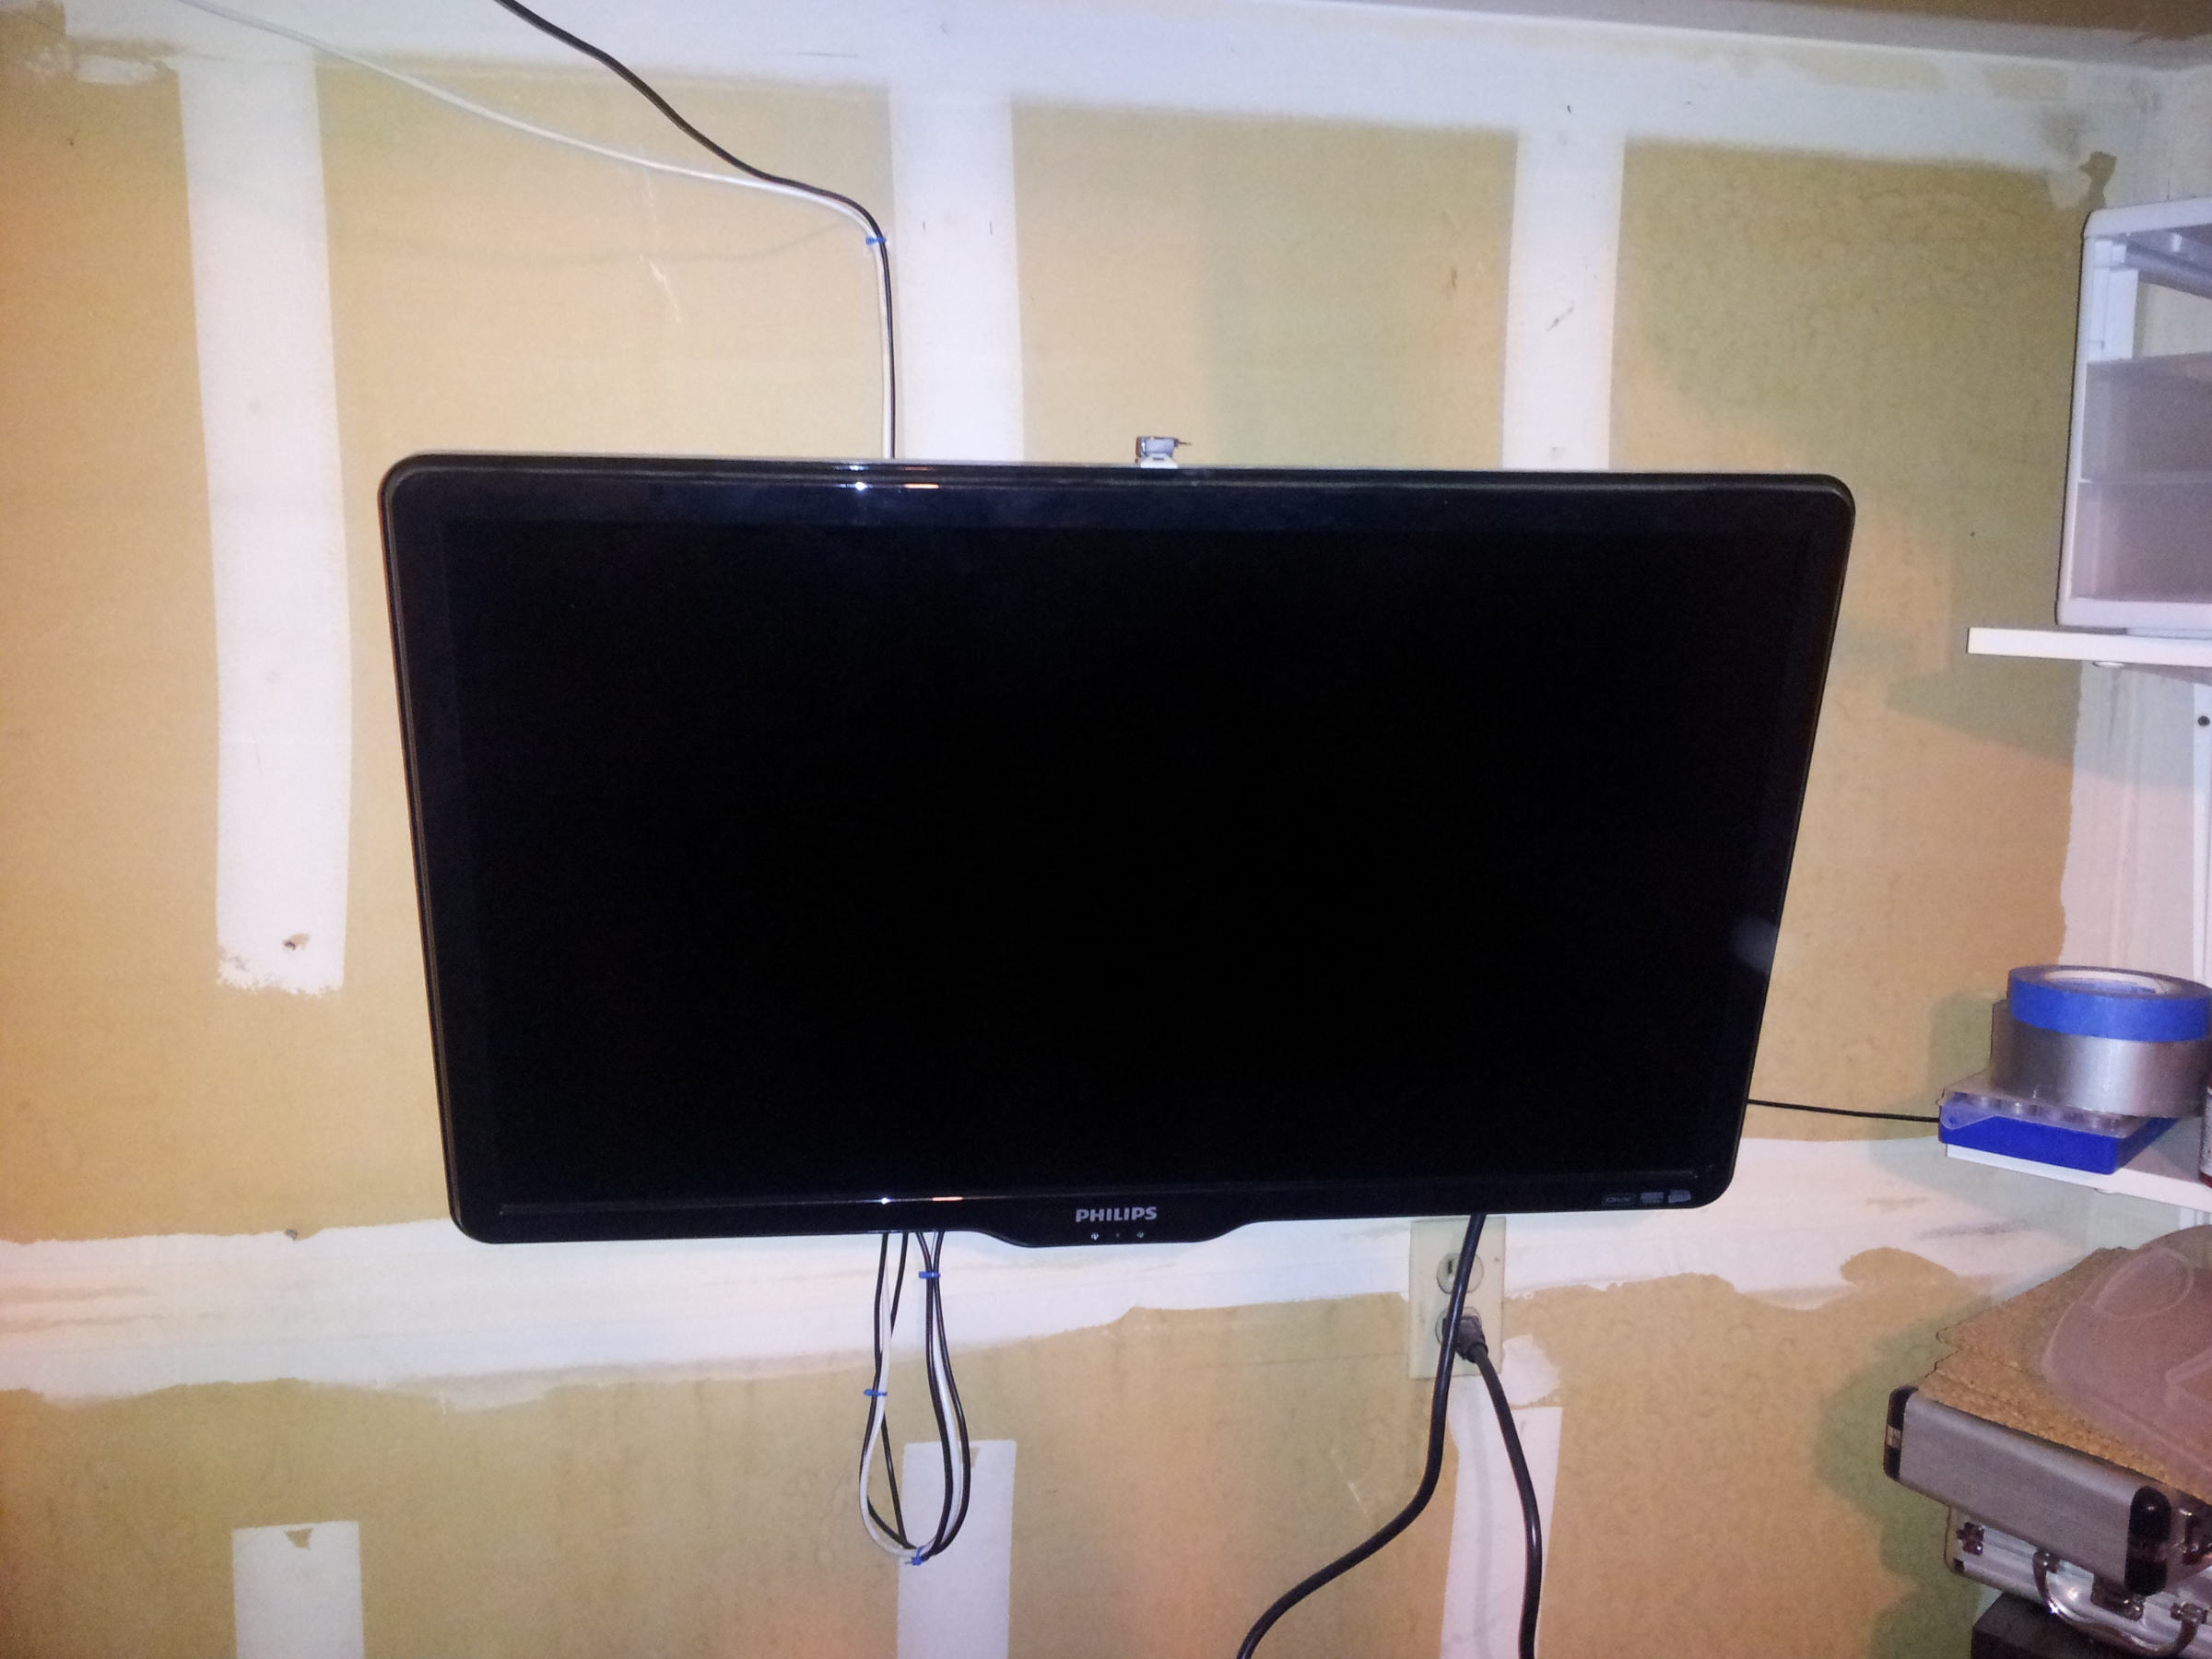
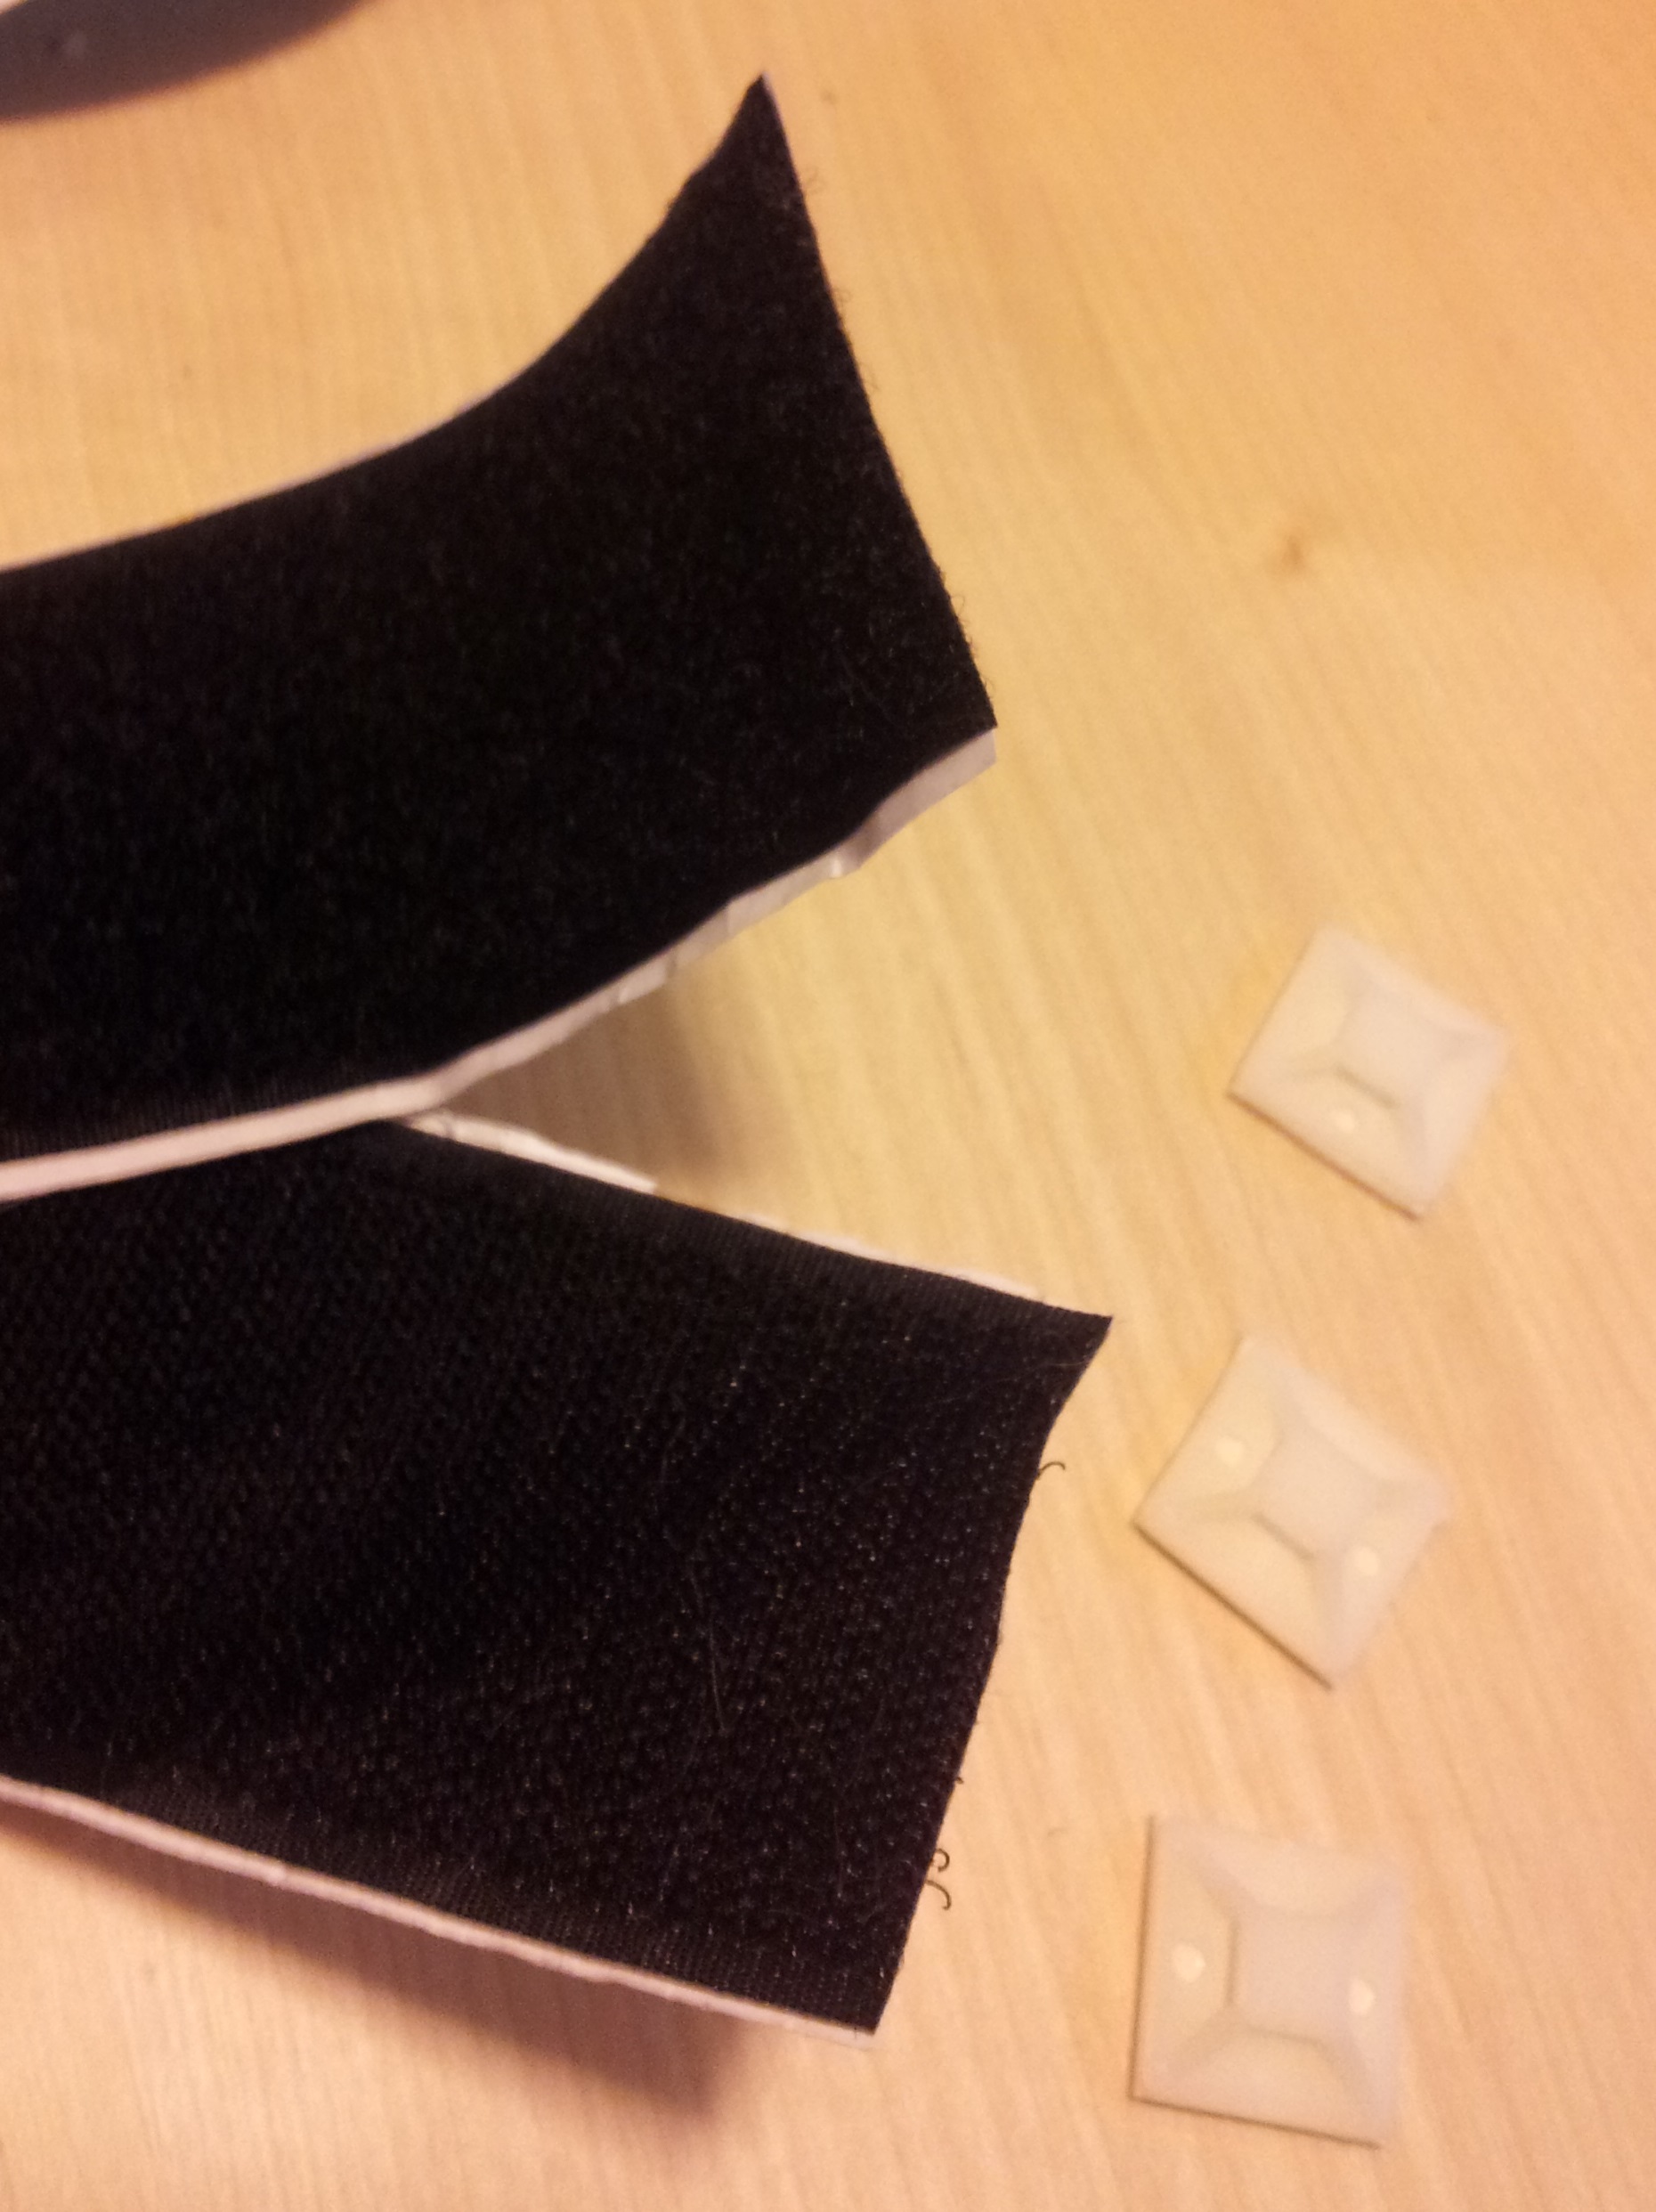
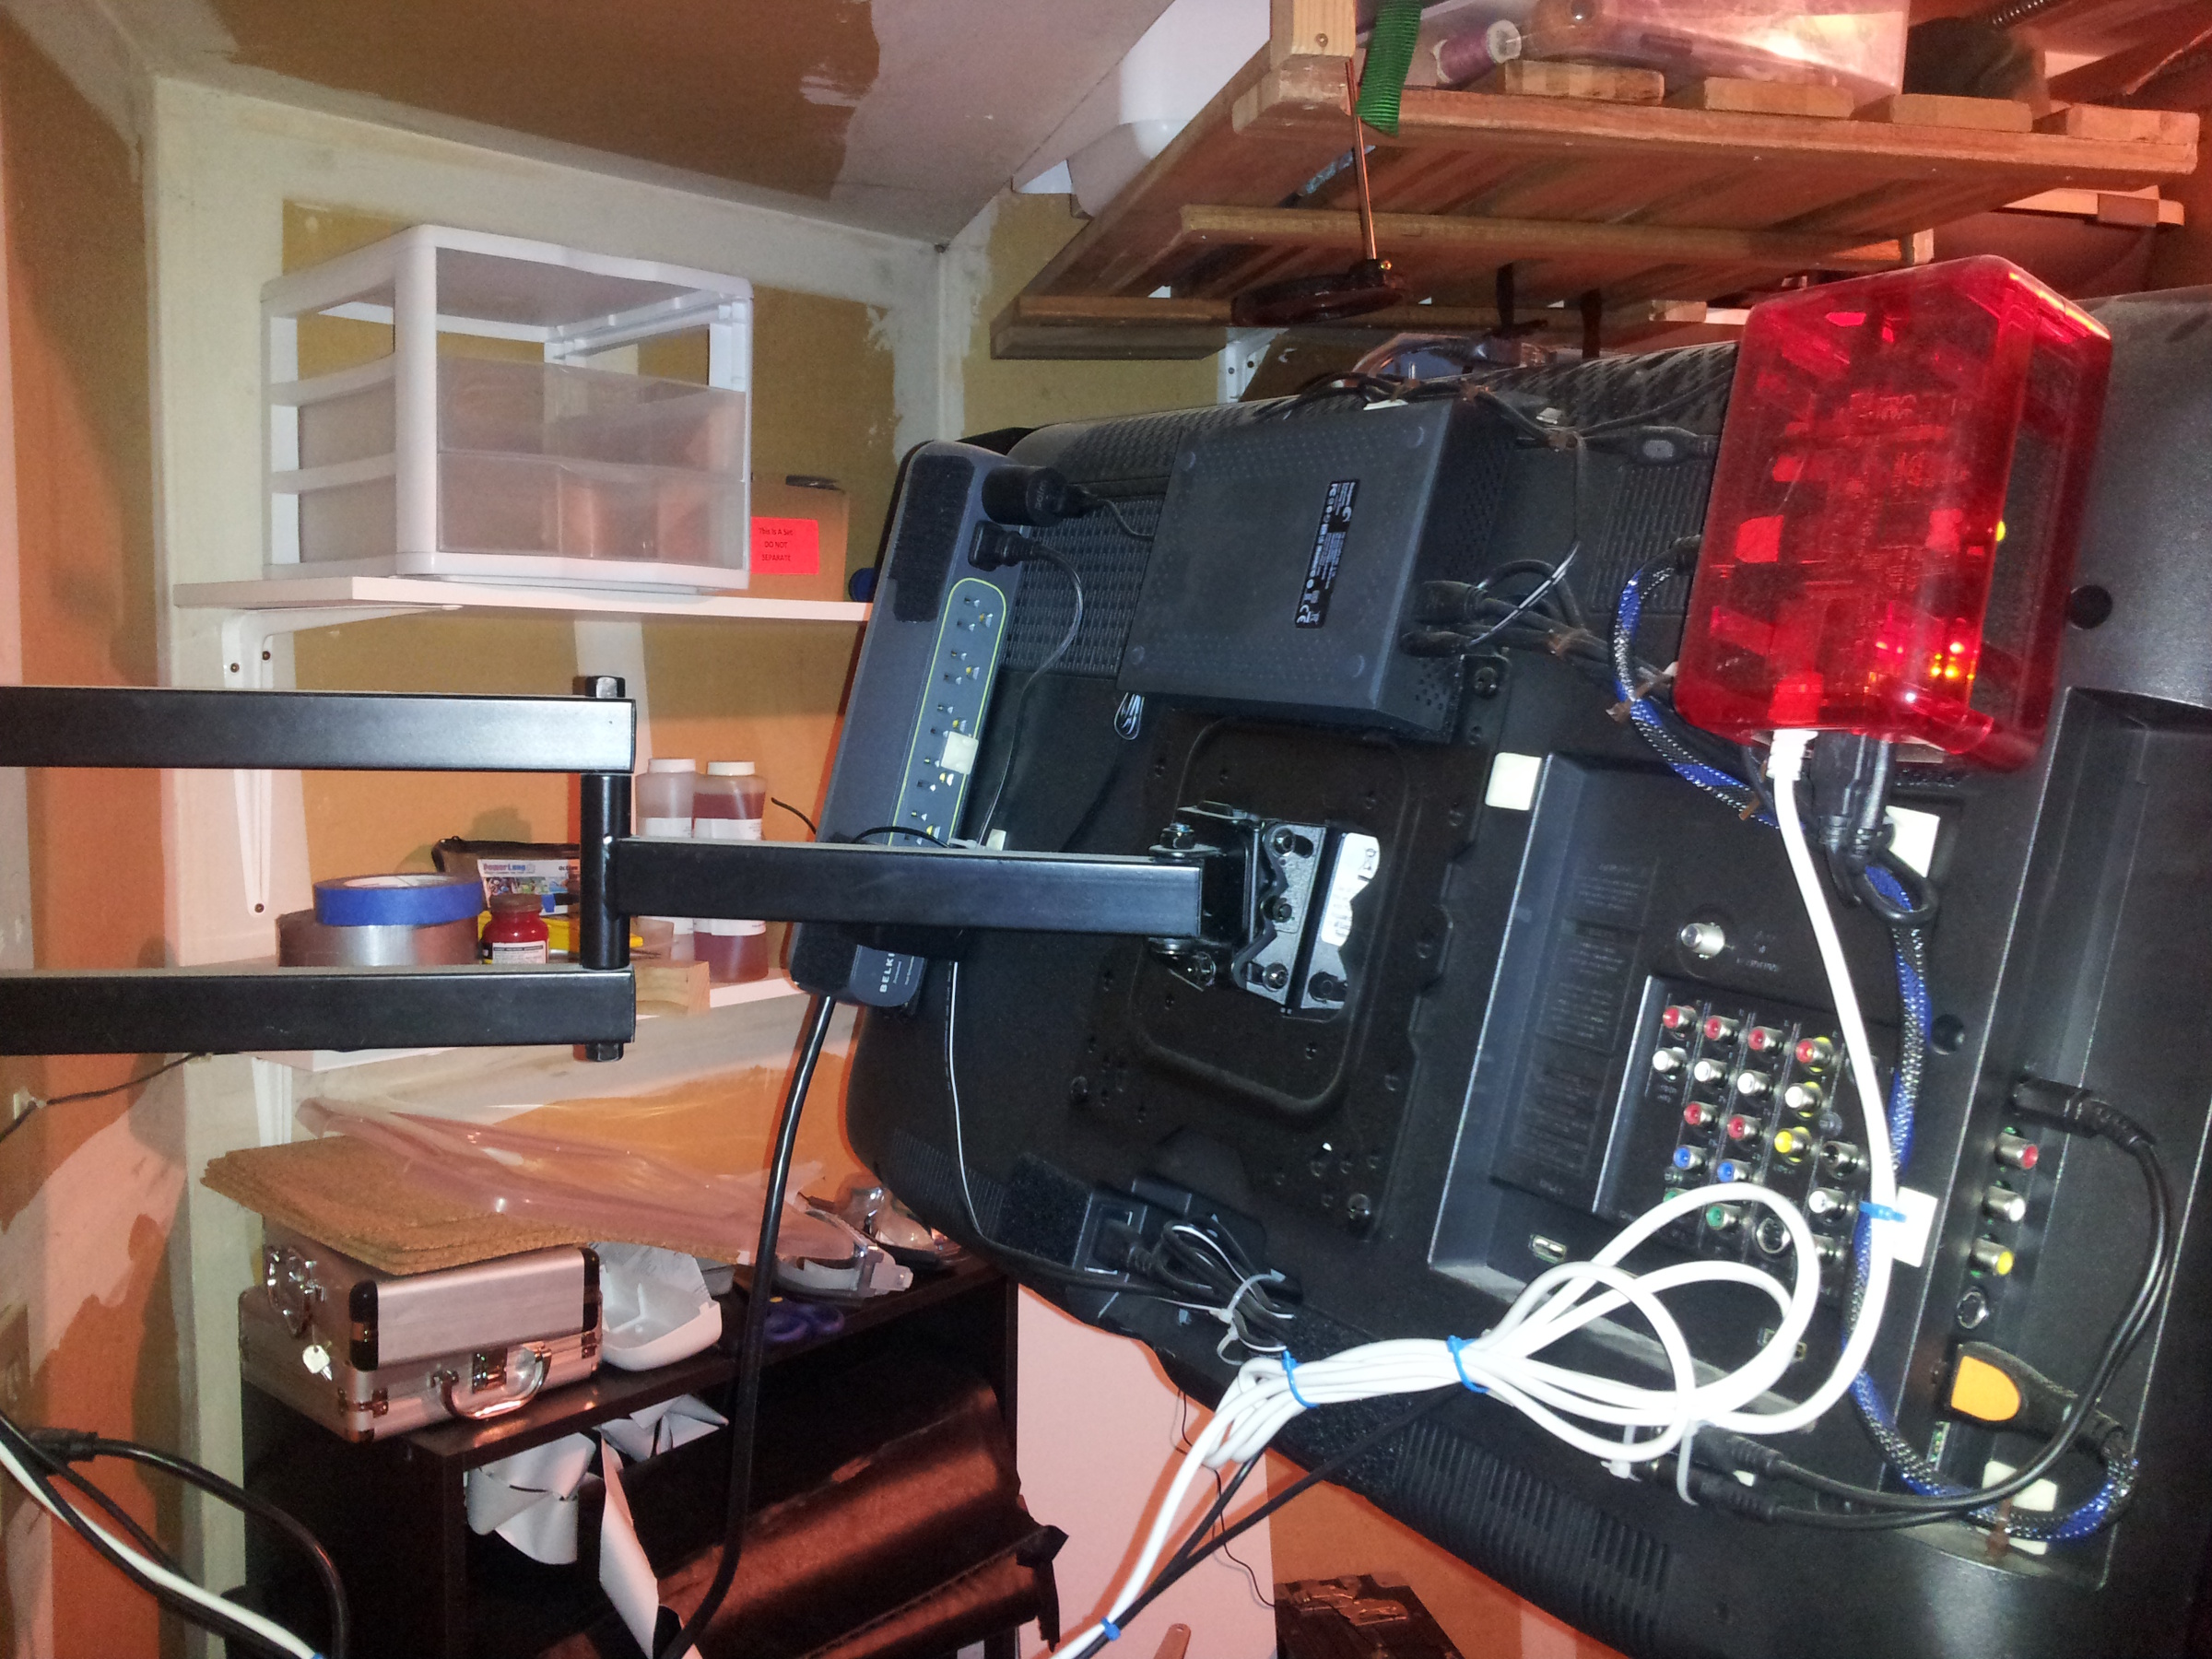
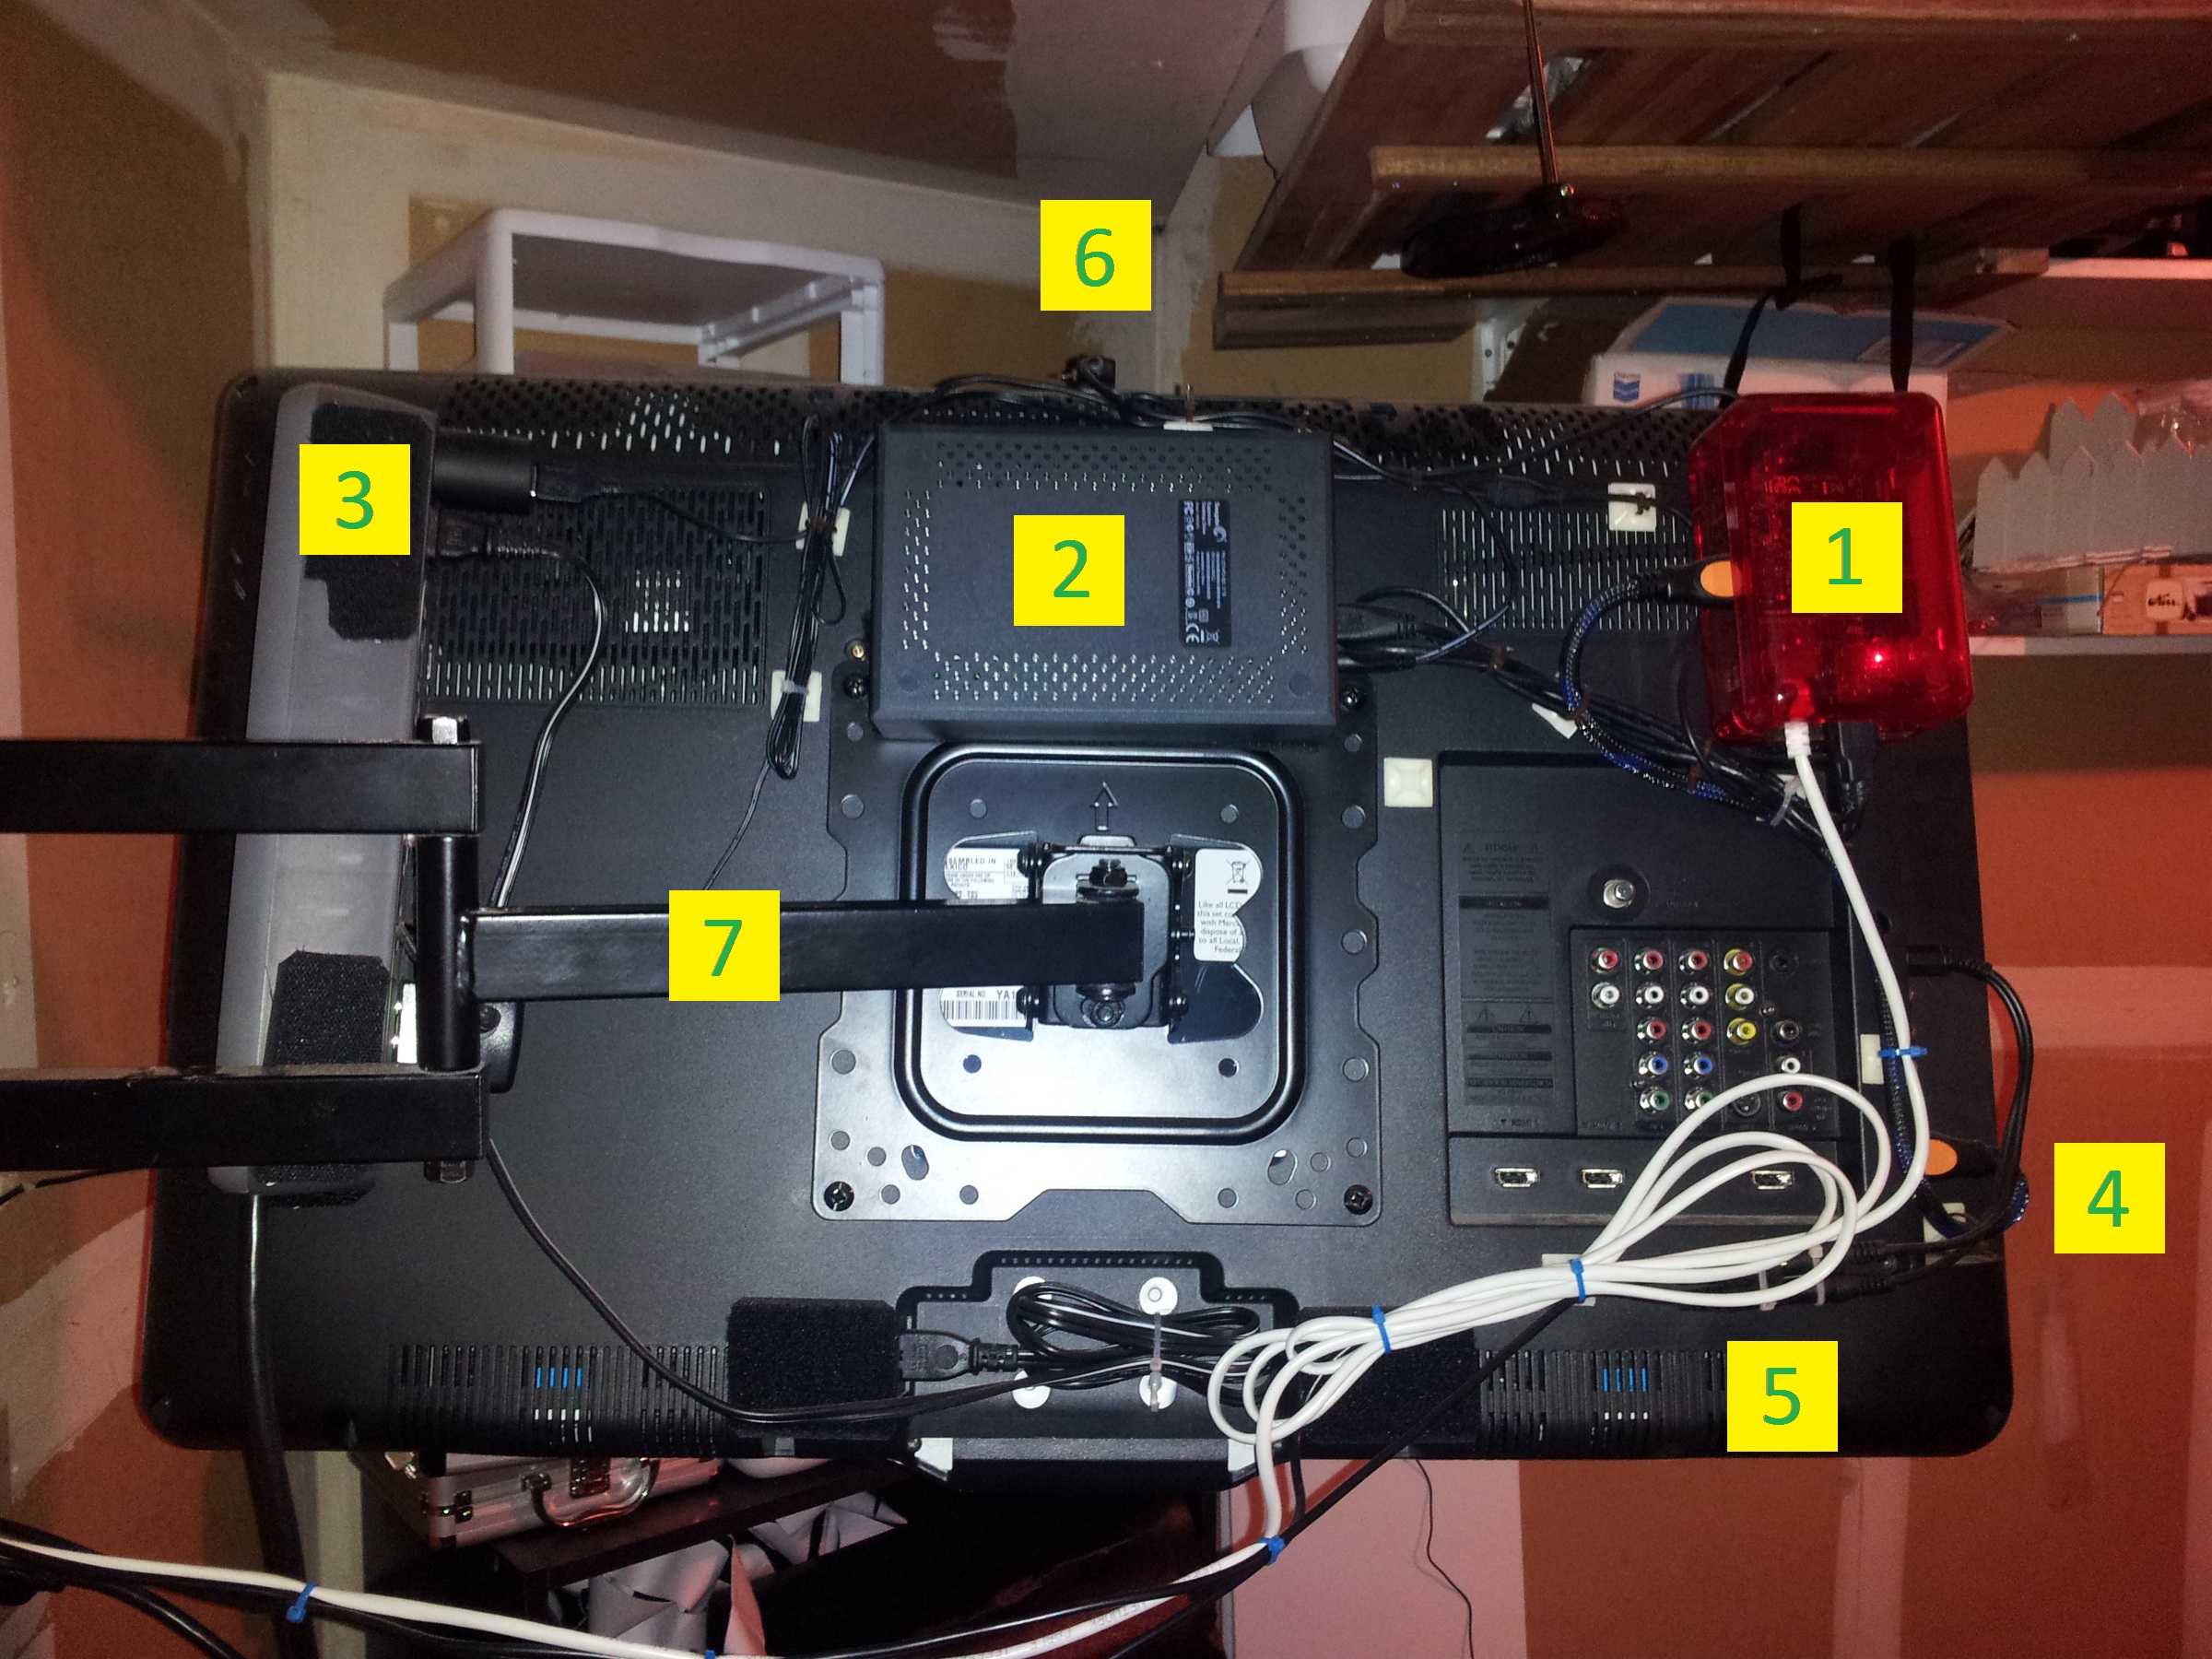
This exercise room TV has only a power cord, network cable, and two headphone leads visible from the front.  Behind, it has a raspberry pi, USB hard disk, connections to the TV, IR remote lead, headphone extensions and a swing arm mount.  Everything is attached in a way that doesn’t interfere with the swing arm and lets it sit against the wall.  I’m seeing this more and more; the kinds of things that you want next to a TV are really small and light nowadays, and TVs are really flat, so it makes a ton of sense to just stick it all on the back.  I used sticky-backed velcro tape and sticky backed cable guides with zip ties.  Don’t be shy with the velcro, I don’t trust it holding more than a pound or so per square inch for something that I’m not going to be checking on and pressing together as needed.  Heavy things can be cable tied to the structure of the TV or VESA mount (the cooling slots are a good place to thread cable ties, for example).

The raspberry pi runs file serving (samba), torrents (transmission-daemon) and plays videos on the tv (XBMC).  It manages about 5MB/s on samba going out the lan port- not the best, but enough for most 1080p videos it might have to share.

cable guides and velcro

pi tv extended

pi tv rear

1. pi in enclosure (BUD industries sandwich enclosure).  This case doesn’t hold the pi very securely so I super glued it in place (to the tabs).  I wouldn’t buy it again, but it’s fine once glued.

2. Seagate 3TB drive.  The pi can’t access drives over 2TB with its stock wheezy image, so it’s formatted 1/2 and 1/2, see this note:

http://bofhhost.com/index.php/2012/10/12/how-to-add-3tb-disk-to-raspberry-pi/

3. power strip. TV plug, external drive power supply, PI usb power supply (I used one that came with a palm pixi.  I did have some problems with typical throwaway usb supplies)

4. short HDMI cable- I got a 2 footer so it wouldn’t be coiled up.

5. ethernet cable, audio Y cable, and two 12 foot headphone extensions- these help hear the TV while exercising.  Volume control is important with a splitter- each side gets its own volume wheel, one built into a set of headphones, one Koss VC20 inline volume control.

6. IR USB dongle for the wireless keyboard, on a short USB extension cable.  It peeks over the top of the TV.

7. swing arm- “videosecu cantilever swing and tilt” from amazon.  Flat TVs are light enough that they don’t need much to hold them up, and this ended up really solid (and only $30).

http://www.amazon.com/gp/product/0972683275